There is a number of functions in the video call that can improve and elevate your virtual consultation workflow. In this article, we highlight three of them and present some examples of how they can be used: chat, screen sharing and large screen view.

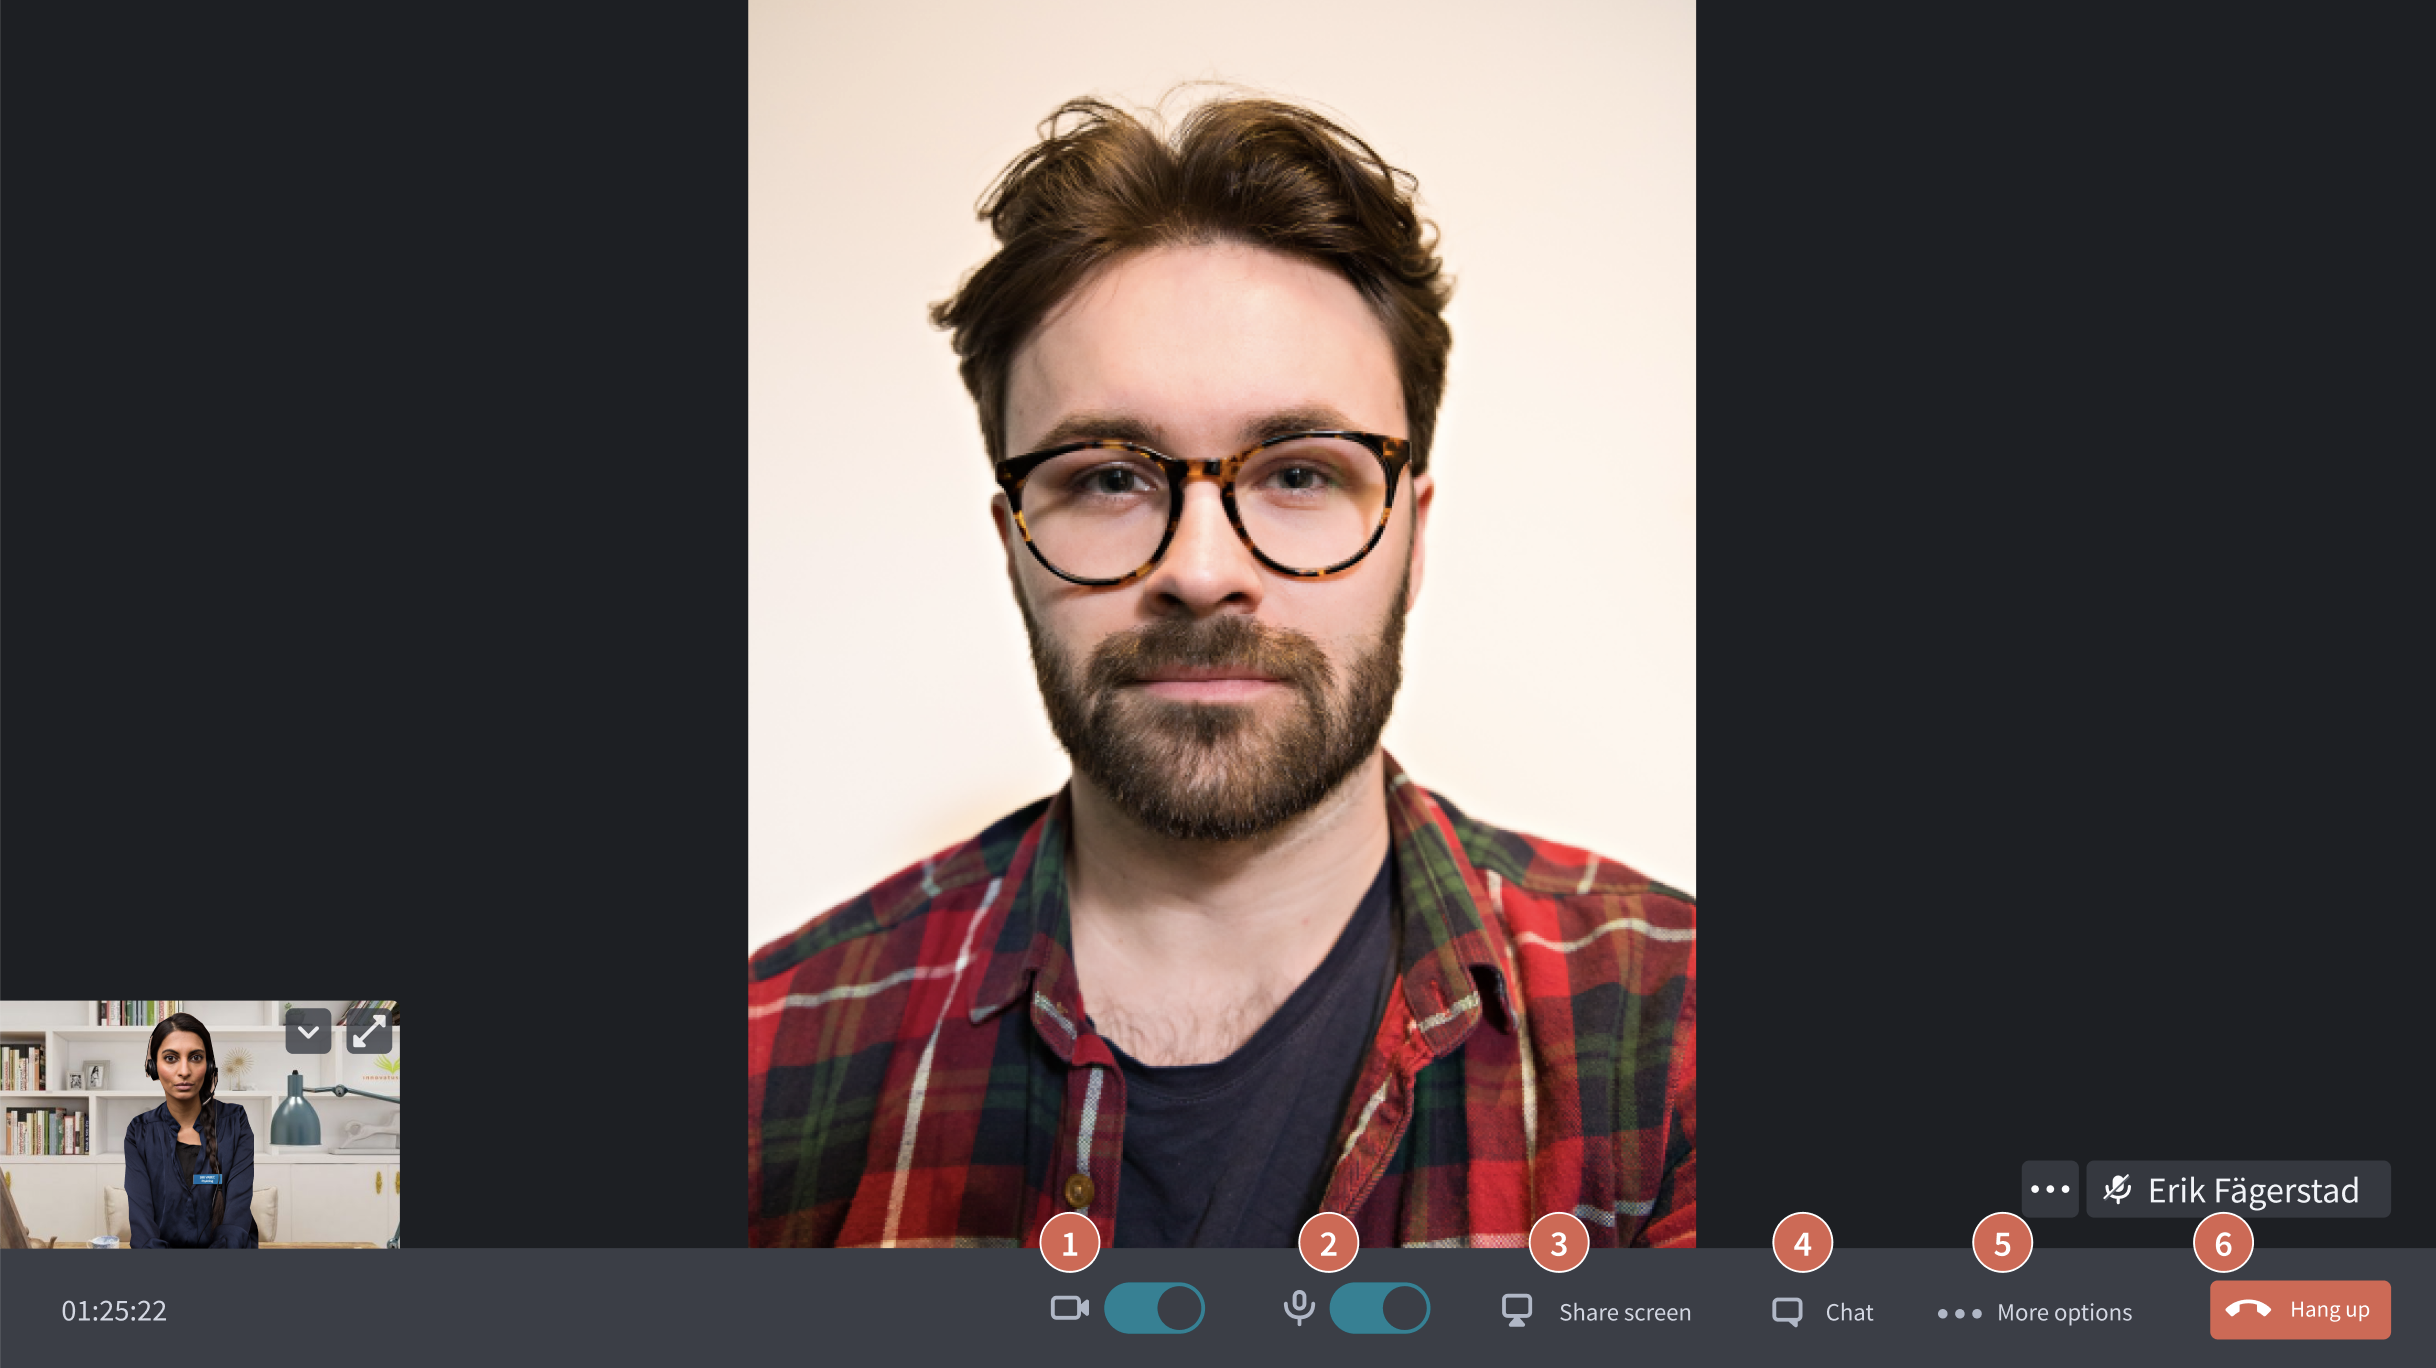
The field at the bottom of the screen has the following functions:
1. Turn off the camera
2. Mute the microphone
3. Share screen
4. Chat
5. More options
6. Hang up
Read more about the different functions below.
Chat – an alternative channel during the consultation
The chat function can be very helpful, for example, if anything tech-adjacent goes awry, such as the patient is muted and doesn't know how to unmute herself and where you and the patient want to agree on an alternative form of meeting or continue your dialogue by writing to each other. In addition, some patients prefer to express themselves via text rather than in a video format, especially younger people. In this case, you can turn off the camera and chat with each other in real-time instead.
In addition to sending text messages, you can send files in the chat, e.g. photos, videos or documents. When you upload a file, a thumbnail is displayed, so you can be sure that the correct file is attached. Once the file is sent, both you and other participants can click on it to see it in large format. Files sent in the chat are automatically saved both in the call and in the meeting view in the calendar.

All participants in the conversation can see what is posted in the chat, which makes it an effective channel to share information, for example, during a group session.
Share visual information via screen sharing
During the video call, you can share your screen with the patient. The Screen Sharing feature can be used to display documents, images or guide a patient through instructions or programs. This can be helpful if, for example, you want to display content from your website, an exercise program, a diet journal or test results that you want to discuss with the patient. You can also illustrate something for the patient or other participants by sharing a screen and drawing something using a drawing program such as Paint or a digital whiteboard, if you have access to one.
Patients and guests can also share their screen if they use the web interface on a computer. However, they can not share a screen if they use the app.
To share your screen during a video consultation, follow these steps:
Click Share screen at the bottom of your screen.

In the next step, you can choose to share your entire screen, or a window from a specific application, e.g. a Word or PDF file.

You can also share a tab from your web browser.

The patient does not see you in the picture when you share your screen, but only sees himself and the screen that is shared. However, as a healthcare professional, you can see the participants while sharing your screen.
Please note: Screen sharing works best if the patient logs in via a computer. If the patient is using a smartphone, ask the patient to tilt their mobile to a horizontal/landscape position to be able to see the entire screen.
Customise your own image during the video call
You can easily customise your own image during the video call.
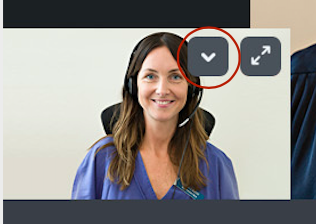
You can enlarge your own image by clicking on the diagonal arrow at the top right of your image. Then you can clearly see what you are showing and what the patient sees in the picture. This is very helpful if you e.g. want to show exercises or an aid. It is also useful if you want to see how much of your background is visible to the patient.

If you want, you can also hide your image from yourself by clicking on the small down arrow. The patient can then still see you, but you do not have to be distracted by your own image.

In multi-party video calls, it is possible to see up to nine participants in a picture at the same time, in addition to your own picture. If you find that your own image hides too much of the participant above you, you can make your own image smaller. In this case, you use the computer's own system to reduce the image and then enlarge it again.
If you are using a Windows computer, click on the image and then ctrl + minus to reduce it. If you want to make it bigger again, click on ctrl + plus.
If you are using a Mac computer, click command + minus instead to reduce the image, and command + plus to enlarge it again.
Note that the patient's view is not affected by changing your image view.